How To Remove Table Lines From A Microsoft Word Document
There are a few methods for either undoing or removing the horizontal line or preventing Word from automatically creating it. If you want more exact spacing select Line Spacing Options.

How To Remove Borders From A Table In Microsoft Word For Office 365 Support Your Tech
For quality business and academic presentation of a table correct formatting is essential.

How to remove table lines from a microsoft word document. I cant delete the darn line from my document now. Learn how to create a professional table for presentation. The gridlines now display on the table.
Click and drag to select the table lines you want to erase. Under Table Tools click Layout and then click either Delete Row or Delete Column. Click on the Eraser tool on the toolbar.
Delete lines or connectors. You just need to click once and Kutools for Word s Delete RowsColumns utility will remove all empty rows and columns from all or selecetd tables for you quickly. Click on the Eraser tool in the Draw Borders group Word 2007 and Word 2010 or the Draw group Word 2013 and Word 2016.
After you click all the blank lines will be removed from your document. It may be preferences rather than options It is also possible that in addition to the text boundaries you may be displaying table gridlines. 5 neat tips for formatting Microsoft Word tables Part 1.
Every time you insert a table in a Word document Microsoft Word automatically adds a blank space at the beginning and bottom of the table. Choose the Toolbars option from the View menu and make sure Tables and Borders is selected from the resulting submenu. Advertisement In the Table section of the Layout tab click View Gridlines.
The first method is to press Ctrl Z right after typing the characters and pressing Enter to undo the automatic creation of the horizontal line. Click anywhere in the table row or column you want to delete. Open the Word document where you need to remove columns.
If you want to delete multiple lines or connectors select the first line press and hold Ctrl while you select the other lines and then press Delete. This often results in a blank page especially if the table happens to sit at the end of the document. You can turn that off.
Kutools for Word provides you the most convenient way to remove all empty rows and columns from tables in document. This is the one just to the right of the tool that looks like a pencil. Click on the Eraser tool again or press the Esc key.
These tabs are visible only when the insertion point is within the table. To erase table lines follow these steps. Now that the entire table is selected we can remove its boders.
Click or tap anywhere in the paragraph you want to change or press CtrlA to select all text. When you see the confirmation pop-up click OK If you still see any blank lines thats because there were more than two consecutive blank lines in place. Using that Ive gotten the line to move maybe a few lines but then it reverts right back into the document.
Click Home Line Spacing. I cant really get the cursor on it either although Im able to get the cursor to indicate an updown arrow for a moment and the side ruler bar briefly flashes on the left side. In the Replace With box type this.
This turns off the Eraser tool. Click the line connector or shape that you want to delete and then press Delete. Then select your preferred border line.
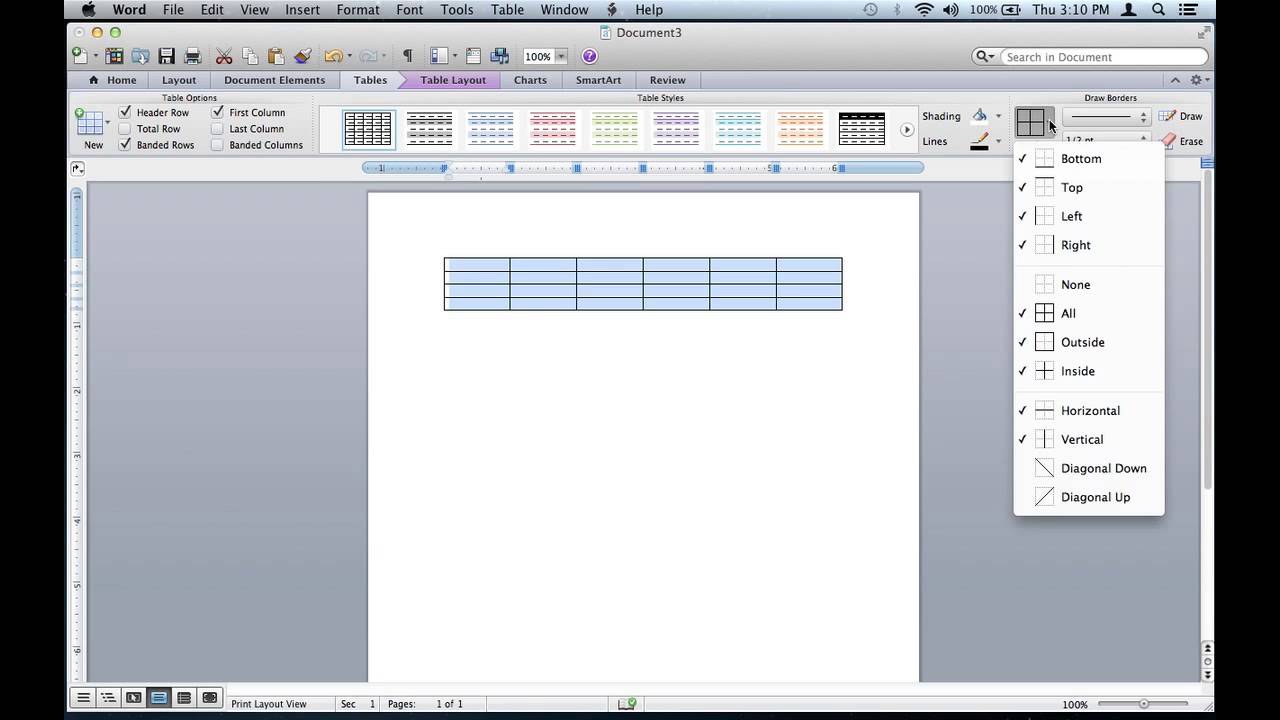
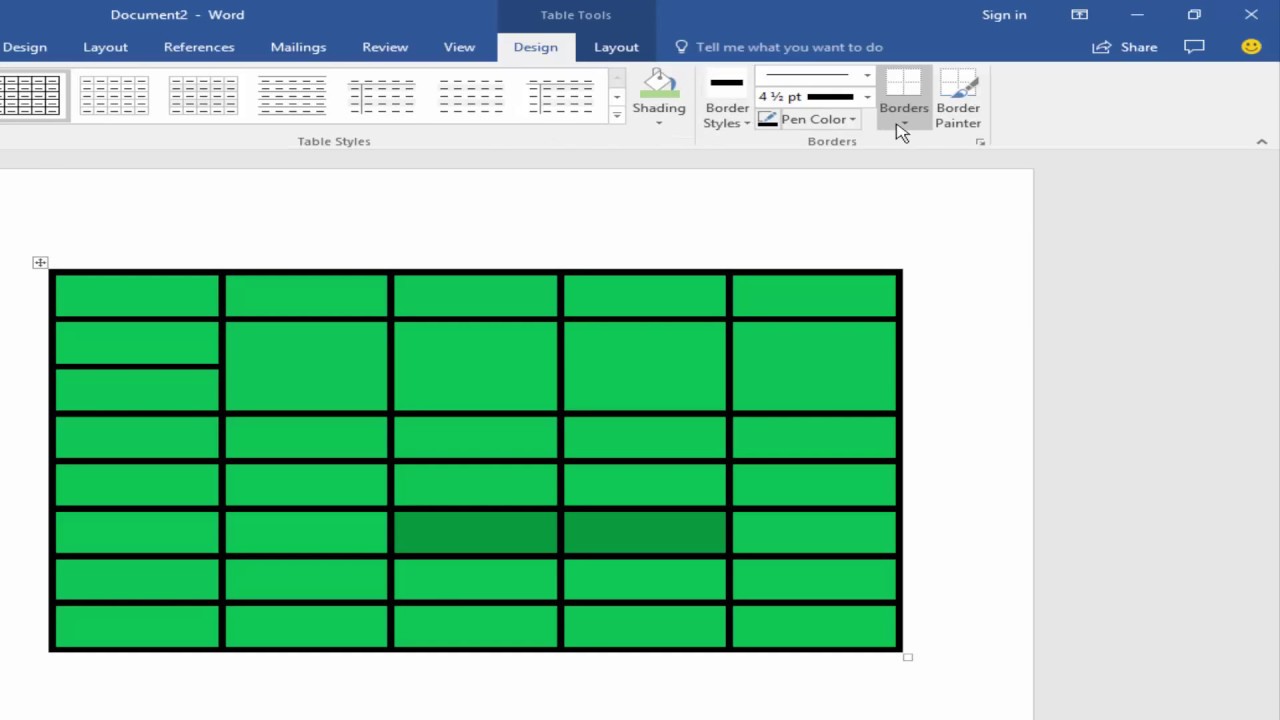
Click to the Design tab and click the down arrow to the right of the Borders button in the Table Styles group. Create your table as you normally would. In the Ribbon click the Layout tab.
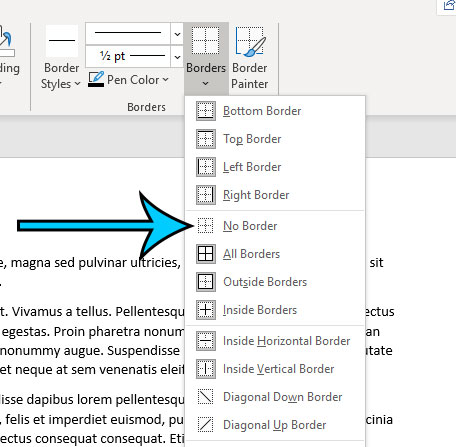
P Then click Replace All at the bottom of the window. Subscribe for more videos. On the ribbon go to Home Paragraph and click the arrow-down button on the Borders button.
The line is removed and your characters remain. If you cant select a line to delete it might actually be a horizontal line which is a type of border. An alternative method is to right-click on the table youve created and click the arrow-down icon on the Borders button.
Delete Blank Page Below Table in Microsoft Word. Remove all empty rows and columns from tables with one click. If youre not already in Editing View click Edit Document Edit in Word for the web.
First of all select your table. Just like when using the Ribbon use this to select a preferred border line option. Click the Layout table under Table Tools.
File Options Advanced Look under Show Document Contet Sorry I do not have Word for the Mac but the above should be close. Click and drag to select the table lines you want to erase. In the Page Setup section click the down arrow under Columns then select More Columns.
Place the cursor in a table cell and then click the Layout tab in the Table Tools contextual tab Next click Select Select Table. How to Remove Table Lines From a Microsoft Word Document. Select the line spacing you want.
If you want to remove more than one row or column select a cell in each row or column you want to delete. To turn off the gridlines for the table simply select the table and click View Gridlines again.

How To Remove Table Borders In Word 2010 Solve Your Tech

How To Remove Table Borders In Microsoft Word For Office 365 Masteryourtech Com

How To Remove Automatic Horizontal Lines In Word
How To Remove Table Lines From A Microsoft Word Document Microsoft Office Tips Youtube

How To Hide Table Gridlines In Word 2010 Solve Your Tech
How To Remove The Borders From A Table In Microsoft Word My Microsoft Office Tips
How To Remove Table Border Line In Microsoft Word 2017 Youtube
How To Remove Table Lines From A Microsoft Word Document Microsoft Office Tips Youtube
How To Remove Table Borders In Microsoft Word For Office 365 Masteryourtech Com
Post a Comment for "How To Remove Table Lines From A Microsoft Word Document"